A great audio mix is the key to a great show; without Audio many shows would not sound like they do today! Live mixing is more than just applying microphones and hoping for the best, it is an art!
Equipment
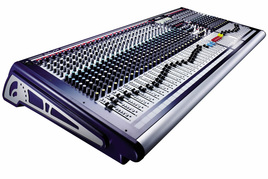
Before you even start setting up your mix, you need to make sure you have the right equipment for the job. Firstly an Analogue or Digital desk? Whatever one you go with you need to be comfortable with the system and make sure you know exactly how to use it. Digital sound desks are different to an analogue desk for many reasons; firstly digital desks mix digital signals not analogue signals and therefore a sound desk cannot be both. Another key difference is that you may only have 10 faders but you could have 40 inputs due the nature of pages; this means your desk can be relatively compact but can handle huge amounts on inputs. The last key different is a digital desk only has one set of knobs for all the channels; you have to select what channel you have to alter but the actual knobs do the same thing. Digital desks may also include parametric EQs, compressors, gates and many other signal processors built into the console reducing the need for external effects processors. Due to the complexity digital desks are usually a lot more expensive but this does not mean they are better – they break a lot more easily and cannot be repaired on the go. For example say you spill water on you analogue desks and it ruins the master outputs you can always route your mix through a group allowing the show to continue where as with a digital desk, the circuit board is likely to be ruined therefore stopping the whole board from working.
Secondly you need to select the type of Microphones you are using (Dynamic or Condenser) and their appropriate Polar Patterns. Getting the right microphone is essential for sound engineering, there are many different types of microphones including wired and wireless and ones with different polar patterns (pick up areas). Microphones use magnetic induction (dynamic microphones) or capacitance change (condenser microphones) to change sound waves (air pressure vibrations) into electrical signals that are used through the process of pre-amps, analogue or digital desks and then loudspeakers where they are amplified. The difference between the two is outlined below:
Dynamic microphones contain a thin diaphragm and when the sound waves strike the diaphragm it vibrates against a metal coil causing electromagnetic induction creating a charge similar to the sound wave. This is a very cost effective way of replicating audio. They can handle extreme temperatures and rough handling and impossible to overload which is an important feature.
Condenser microphones use a diaphragm and an electrically charged back plate. This is basically a capacitor (device which can store a charge), and within an insulator separates the metal-coated back plate, which is rigid, and the diaphragm, which is flexible. When the condenser element is charged, an electrical field is created between the diaphragm and the back plate – an important point is that the charge is equal to the space between them. As sound waves strike the diaphragm and cause it to vibrate, the spacing in between the two surfaces varies, affecting the electrical charge in the capacitor. This fluctuation creates the electrical representation of the sound wave which is transmitted to the desk. There are two types of condenser microphones, the main difference is how the back plate is charged. Electret condenser microphones have a permanently charged back plate however Non-electret require an electrical supply to them and this is known as phantom power. In most cases the desk or stage box supplies phantom power which is 48Vdc and therefore it is sometimes known as adding in 48 volts. It is supplied directly through the microphone cable. Some electret condensers have means of supplying the power in case of a phantom power failure by means of a battery or a battery pack. Due to the complexity of their design and the circuitry required, condenser microphones can be considerably more expensive than dynamic microphones. They are also more sensitive to temperature and humidity changes or rough handling. However, condensers are more useful in certain areas; they are usually a lot smaller than dynamics making them a lot easier to hide! Secondly, they generally have much better frequency response and higher sensitivity therefore better for overhead microphone techniques where the microphones are placed much further away from the source of the sound.
Polar patterns indicate what areas the microphone is best at picking sound up at; the most common are Omnidirectional, Figure of Eight (Bi-directional), Cardioid, Hyper-Cardioid and Line and Gradient (Shotgun). Each of these have different pick up areas and have different uses, outlined below is a brief summary of each type:
Setting up
Once you have decided on your type of desk and microphone, the first stage is to plug everything in with the rest of the system turned off ideally – this reduces the pops going through the system and will protect the cones in the speakers. You should also decide where is the best position to place the console – usually place it somewhere in clear view of the event and so you can hear the sound! If you are using a signal that is unbalanced (usually jack cables) it is important to route it through a DI box first allowing the signal to become balanced and then through the system.
Mixing
When it comes to the setting up of the mix, it is important to remember the following structure: Microphone Input --> Pre-amp --> EQ --> Amplitude --> Output From this we learn that the actual amplitude of the mix going out isn’t affected until after the EQ which is important to learn. Another key thing to know is the difference between Pre and Post fader – Pre fader is anything that is not affected by the level the fader is at and post is affected by the level of your fader. For example a pre fader monitor will always deliver sound even if the fader is down where as a post fader monitor will only deliver sound when that sound is live.
In order to set up your mix it is important to follow an ordered procedure – firstly reset the desk to its original format, this involves removing all Gain, EQ settings, Aux Send etc! Whether you are using an analogue or digital desk in the centre of the desk there are usually several knobs; the first is always the gain control. Here most of the noise of interference is picked up, because of the high gains needed for microphones. Balanced inputs, such as XLR will reduce interference problems. AN easy way to set your gain is to fade up both the channel fader and main mix up to 0 and then turn up the gain until it reaches a suitable level, too much gain will cause feedback! Once you have set your gain, try not to touch it for the rest of the performance unless it is necessary as it will affect the EQ and the Aux sends.
It is a good idea to fade up and set rough levels for all the channels before setting up the rest of the desk, if you are having to fade extremely high up to get sound, your gain is likely to be too low.
The next section is normally the Equalization section of the EQ; it affects the signal by separately reducing or boosting a range of frequencies, e.g., bass, mids, and treble. You can connect up further Equalizers to have better control however this isn’t always needed with digital desks as many have them built in. Here you can reduce certain frequencies that are causing unwanted noise, a useful tip is to close your eyes and see what grabs your attention, if it isn’t the lead singer then knock a bit of bass into their voice and remove it from others. By adding in the bass the brain thinks to sound is closer due to the distance base travels and therefore in your mind you are creating a 3D image of the band. There are different kinds of settings that can also be used within EQ such as a low cut or a low shelf – both of these knock out the lower frequencies in the channel. By adding a graphic EQ (included in digital desks) you can control many individual frequencies which is useful for seeing the curve of the sound.
If you own a digital desk you are likely to have a range of other effects on board, if not you can use these by connecting up an external effects processor. A compressor can be extremely useful in mixing, if you set up a compressor the desk will compress to the sound when it reaches a certain level making it useful for people who suddenly sing loudly.
A gate can be considered the opposite of compressor, by setting a gate the channel only comes into play when the sound is above a certain level making this extremely useful for users who decide to whisper into their microphones.
The auxiliary send routes some of the incoming signal to a bus which then can be routed to external devices such as monitors. Auxiliary sends can either be pre-fader or post-fader, the level of a pre-fader send is set by the auxiliary knob whereas the post-fader send is set by the position of the fader. Pre-faders are normally used for monitors and post-faders are normally for reverb however this is not always strictly followed. In many concerts, there will be a separate mixer for the fold backs and IEM’s, this allows the engineer to purely concentrate on the FOH sound and allow someone else to mix the returns, with digital desks this is easy to set up if you use digital snakes as the signal can be split and it is the same principle with Analogue Desks but it is a lot more expensive for the equipment.
You may also have a pan control, PFL button, mute button or a grouping tool. The pan decides whether the audio is sent to the left or right or both. PFL stands for pre-fade listening and you can listen to the mix and alter certain attributes without it going live, sometimes this may be called Solo on your desk. Mute does what it says, it mutes the channel and grouping allows you to connect the channel up to a group for group mutes or group levels.
An advanced tool on many desks is the Phase reverse button; this reverses the phase by 180 degrees on one channel – this is needed as sound is produced from the speaker by throwing the cone forward and pulling it back and sometimes phase cancellation causes the speaker cone not to move so by applying this, it can move and produce sound.
If you are encountering feedback try a reposition the mic or change its polar pattern! Also reduce the gain however there is no fix for poorly positioned microphones. A key thing to remember is change a small bit at a time and listen to it and see if it causes a large effect!
The Subgroup and main output fader controls are often found together on the right hand side of the mixer or, on larger consoles, in a centre section of many banks of input channels. Headphone connections are often found here and local loudspeaker monitoring controls. Talkback controls allow conversation with the artist through their monitors, headphones or in-ear monitor. There may also be meters for you to see how loud the mix is.
Hopefully this guide has given you a brief overview to mixing, if you have any questions please feel free to contact us!
Equipment
Before you even start setting up your mix, you need to make sure you have the right equipment for the job. Firstly an Analogue or Digital desk? Whatever one you go with you need to be comfortable with the system and make sure you know exactly how to use it. Digital sound desks are different to an analogue desk for many reasons; firstly digital desks mix digital signals not analogue signals and therefore a sound desk cannot be both. Another key difference is that you may only have 10 faders but you could have 40 inputs due the nature of pages; this means your desk can be relatively compact but can handle huge amounts on inputs. The last key different is a digital desk only has one set of knobs for all the channels; you have to select what channel you have to alter but the actual knobs do the same thing. Digital desks may also include parametric EQs, compressors, gates and many other signal processors built into the console reducing the need for external effects processors. Due to the complexity digital desks are usually a lot more expensive but this does not mean they are better – they break a lot more easily and cannot be repaired on the go. For example say you spill water on you analogue desks and it ruins the master outputs you can always route your mix through a group allowing the show to continue where as with a digital desk, the circuit board is likely to be ruined therefore stopping the whole board from working.
Secondly you need to select the type of Microphones you are using (Dynamic or Condenser) and their appropriate Polar Patterns. Getting the right microphone is essential for sound engineering, there are many different types of microphones including wired and wireless and ones with different polar patterns (pick up areas). Microphones use magnetic induction (dynamic microphones) or capacitance change (condenser microphones) to change sound waves (air pressure vibrations) into electrical signals that are used through the process of pre-amps, analogue or digital desks and then loudspeakers where they are amplified. The difference between the two is outlined below:
Dynamic microphones contain a thin diaphragm and when the sound waves strike the diaphragm it vibrates against a metal coil causing electromagnetic induction creating a charge similar to the sound wave. This is a very cost effective way of replicating audio. They can handle extreme temperatures and rough handling and impossible to overload which is an important feature.
Condenser microphones use a diaphragm and an electrically charged back plate. This is basically a capacitor (device which can store a charge), and within an insulator separates the metal-coated back plate, which is rigid, and the diaphragm, which is flexible. When the condenser element is charged, an electrical field is created between the diaphragm and the back plate – an important point is that the charge is equal to the space between them. As sound waves strike the diaphragm and cause it to vibrate, the spacing in between the two surfaces varies, affecting the electrical charge in the capacitor. This fluctuation creates the electrical representation of the sound wave which is transmitted to the desk. There are two types of condenser microphones, the main difference is how the back plate is charged. Electret condenser microphones have a permanently charged back plate however Non-electret require an electrical supply to them and this is known as phantom power. In most cases the desk or stage box supplies phantom power which is 48Vdc and therefore it is sometimes known as adding in 48 volts. It is supplied directly through the microphone cable. Some electret condensers have means of supplying the power in case of a phantom power failure by means of a battery or a battery pack. Due to the complexity of their design and the circuitry required, condenser microphones can be considerably more expensive than dynamic microphones. They are also more sensitive to temperature and humidity changes or rough handling. However, condensers are more useful in certain areas; they are usually a lot smaller than dynamics making them a lot easier to hide! Secondly, they generally have much better frequency response and higher sensitivity therefore better for overhead microphone techniques where the microphones are placed much further away from the source of the sound.
Polar patterns indicate what areas the microphone is best at picking sound up at; the most common are Omnidirectional, Figure of Eight (Bi-directional), Cardioid, Hyper-Cardioid and Line and Gradient (Shotgun). Each of these have different pick up areas and have different uses, outlined below is a brief summary of each type:
- An Omnidirectional Microphone covers all areas and picks up sound in a 360 degrees radius; this makes them ideal for headset microphones, lapels and for simple handheld microphones. They are not sensitive to the wind and are less susceptible to popping noises (plosive sounds).
- A Figure of Eight Microphone pick up sound from the front and back of the microphone and reject all sound that comes in from the side; this makes them ideal for duets, studio microphones and broadcasting.
- Cardioid Microphones pick up sound within a 120 degrees radius from the direction they are facing; due to this, they help to reduce feedback but they are susceptible to wind and popping noises (plosive sounds). The Cardioid design is achieved by putting an Omnidirectional Polar Pattern with a Figure of Eight Pattern.
- Hyper-Cardioid are very similar to Cardioid Microphones but pick up sound within a 100 degrees radius; this makes them extremely good at reducing feedback and have better side rejection than Cardioid Microphones. This makes them an ideal choice for a singer.
- Line and Gradient (Shotgun) microphones use a highly complex directional polar pattern; it works by having an interference tube in front of the capsule with small slits in the tube. It picks up sound from one direction only by eliminating sound from the side due to Phase cancellation. The longer the interference tube, the tighter the polar pattern and therefore the more directional it is. Shotgun microphones are brilliant for film and TV works as they do not have to be right by the sound source and therefore can be kept out the way of the camera.
Setting up
Once you have decided on your type of desk and microphone, the first stage is to plug everything in with the rest of the system turned off ideally – this reduces the pops going through the system and will protect the cones in the speakers. You should also decide where is the best position to place the console – usually place it somewhere in clear view of the event and so you can hear the sound! If you are using a signal that is unbalanced (usually jack cables) it is important to route it through a DI box first allowing the signal to become balanced and then through the system.
Mixing
When it comes to the setting up of the mix, it is important to remember the following structure: Microphone Input --> Pre-amp --> EQ --> Amplitude --> Output From this we learn that the actual amplitude of the mix going out isn’t affected until after the EQ which is important to learn. Another key thing to know is the difference between Pre and Post fader – Pre fader is anything that is not affected by the level the fader is at and post is affected by the level of your fader. For example a pre fader monitor will always deliver sound even if the fader is down where as a post fader monitor will only deliver sound when that sound is live.
In order to set up your mix it is important to follow an ordered procedure – firstly reset the desk to its original format, this involves removing all Gain, EQ settings, Aux Send etc! Whether you are using an analogue or digital desk in the centre of the desk there are usually several knobs; the first is always the gain control. Here most of the noise of interference is picked up, because of the high gains needed for microphones. Balanced inputs, such as XLR will reduce interference problems. AN easy way to set your gain is to fade up both the channel fader and main mix up to 0 and then turn up the gain until it reaches a suitable level, too much gain will cause feedback! Once you have set your gain, try not to touch it for the rest of the performance unless it is necessary as it will affect the EQ and the Aux sends.
It is a good idea to fade up and set rough levels for all the channels before setting up the rest of the desk, if you are having to fade extremely high up to get sound, your gain is likely to be too low.
The next section is normally the Equalization section of the EQ; it affects the signal by separately reducing or boosting a range of frequencies, e.g., bass, mids, and treble. You can connect up further Equalizers to have better control however this isn’t always needed with digital desks as many have them built in. Here you can reduce certain frequencies that are causing unwanted noise, a useful tip is to close your eyes and see what grabs your attention, if it isn’t the lead singer then knock a bit of bass into their voice and remove it from others. By adding in the bass the brain thinks to sound is closer due to the distance base travels and therefore in your mind you are creating a 3D image of the band. There are different kinds of settings that can also be used within EQ such as a low cut or a low shelf – both of these knock out the lower frequencies in the channel. By adding a graphic EQ (included in digital desks) you can control many individual frequencies which is useful for seeing the curve of the sound.
If you own a digital desk you are likely to have a range of other effects on board, if not you can use these by connecting up an external effects processor. A compressor can be extremely useful in mixing, if you set up a compressor the desk will compress to the sound when it reaches a certain level making it useful for people who suddenly sing loudly.
A gate can be considered the opposite of compressor, by setting a gate the channel only comes into play when the sound is above a certain level making this extremely useful for users who decide to whisper into their microphones.
The auxiliary send routes some of the incoming signal to a bus which then can be routed to external devices such as monitors. Auxiliary sends can either be pre-fader or post-fader, the level of a pre-fader send is set by the auxiliary knob whereas the post-fader send is set by the position of the fader. Pre-faders are normally used for monitors and post-faders are normally for reverb however this is not always strictly followed. In many concerts, there will be a separate mixer for the fold backs and IEM’s, this allows the engineer to purely concentrate on the FOH sound and allow someone else to mix the returns, with digital desks this is easy to set up if you use digital snakes as the signal can be split and it is the same principle with Analogue Desks but it is a lot more expensive for the equipment.
You may also have a pan control, PFL button, mute button or a grouping tool. The pan decides whether the audio is sent to the left or right or both. PFL stands for pre-fade listening and you can listen to the mix and alter certain attributes without it going live, sometimes this may be called Solo on your desk. Mute does what it says, it mutes the channel and grouping allows you to connect the channel up to a group for group mutes or group levels.
An advanced tool on many desks is the Phase reverse button; this reverses the phase by 180 degrees on one channel – this is needed as sound is produced from the speaker by throwing the cone forward and pulling it back and sometimes phase cancellation causes the speaker cone not to move so by applying this, it can move and produce sound.
If you are encountering feedback try a reposition the mic or change its polar pattern! Also reduce the gain however there is no fix for poorly positioned microphones. A key thing to remember is change a small bit at a time and listen to it and see if it causes a large effect!
The Subgroup and main output fader controls are often found together on the right hand side of the mixer or, on larger consoles, in a centre section of many banks of input channels. Headphone connections are often found here and local loudspeaker monitoring controls. Talkback controls allow conversation with the artist through their monitors, headphones or in-ear monitor. There may also be meters for you to see how loud the mix is.
Hopefully this guide has given you a brief overview to mixing, if you have any questions please feel free to contact us!